
Code editors and IDEs for Python
A code editor is a software tool that can help writing code, editing it. A code editor differs from an IDE in the sense that IDE (Integrated Development Environment) mostly specialize in one language and provide all kinds of a tool like automatic code suggestion, debugging and version control system. Most of the times IDE support a specific language while in code editor can support more than one programming language but you need to set it up individually for each programming language. While most IDEs come pre-installed with the languages they support. That being said, the gap between IDEs and code editors is being narrowed down to the point where it’s hard to differentiate them. And now code editors have extensions like IntelliSense for code auto-completion and suggestions and other extensions to debug the code. So there are no strict implications of these two terms. Nonetheless, both IDEs and code editors help us in writing code.
There are a number of code editors and IDEs for python and we will be only looking at 2 of them. That’s right 2. Both of them are by far, the best choices for python development for beginners and professionals alike.
VISUAL STUDIO CODE
Visual Studio Code (vs code) is an excellent choice for python as well as many other programming languages. It is a free open-source code editor/IDE developed by microsoft. For vs code to work with python, Python needs to be installed on the system, preferably in a conda virtual environment.
Then you need to install a number of plug-ins/extensions for running, debugging and autocompletion of the python code. Vs code can automatically detect the conda activated virtual environment and sets it up as the default python interpreter for the project.
There is an excellent guide guide on vs code official site for setting it up for python development. I will be providing some additional walkthrough steps for the procedure.
Python set up
Steps to follow:
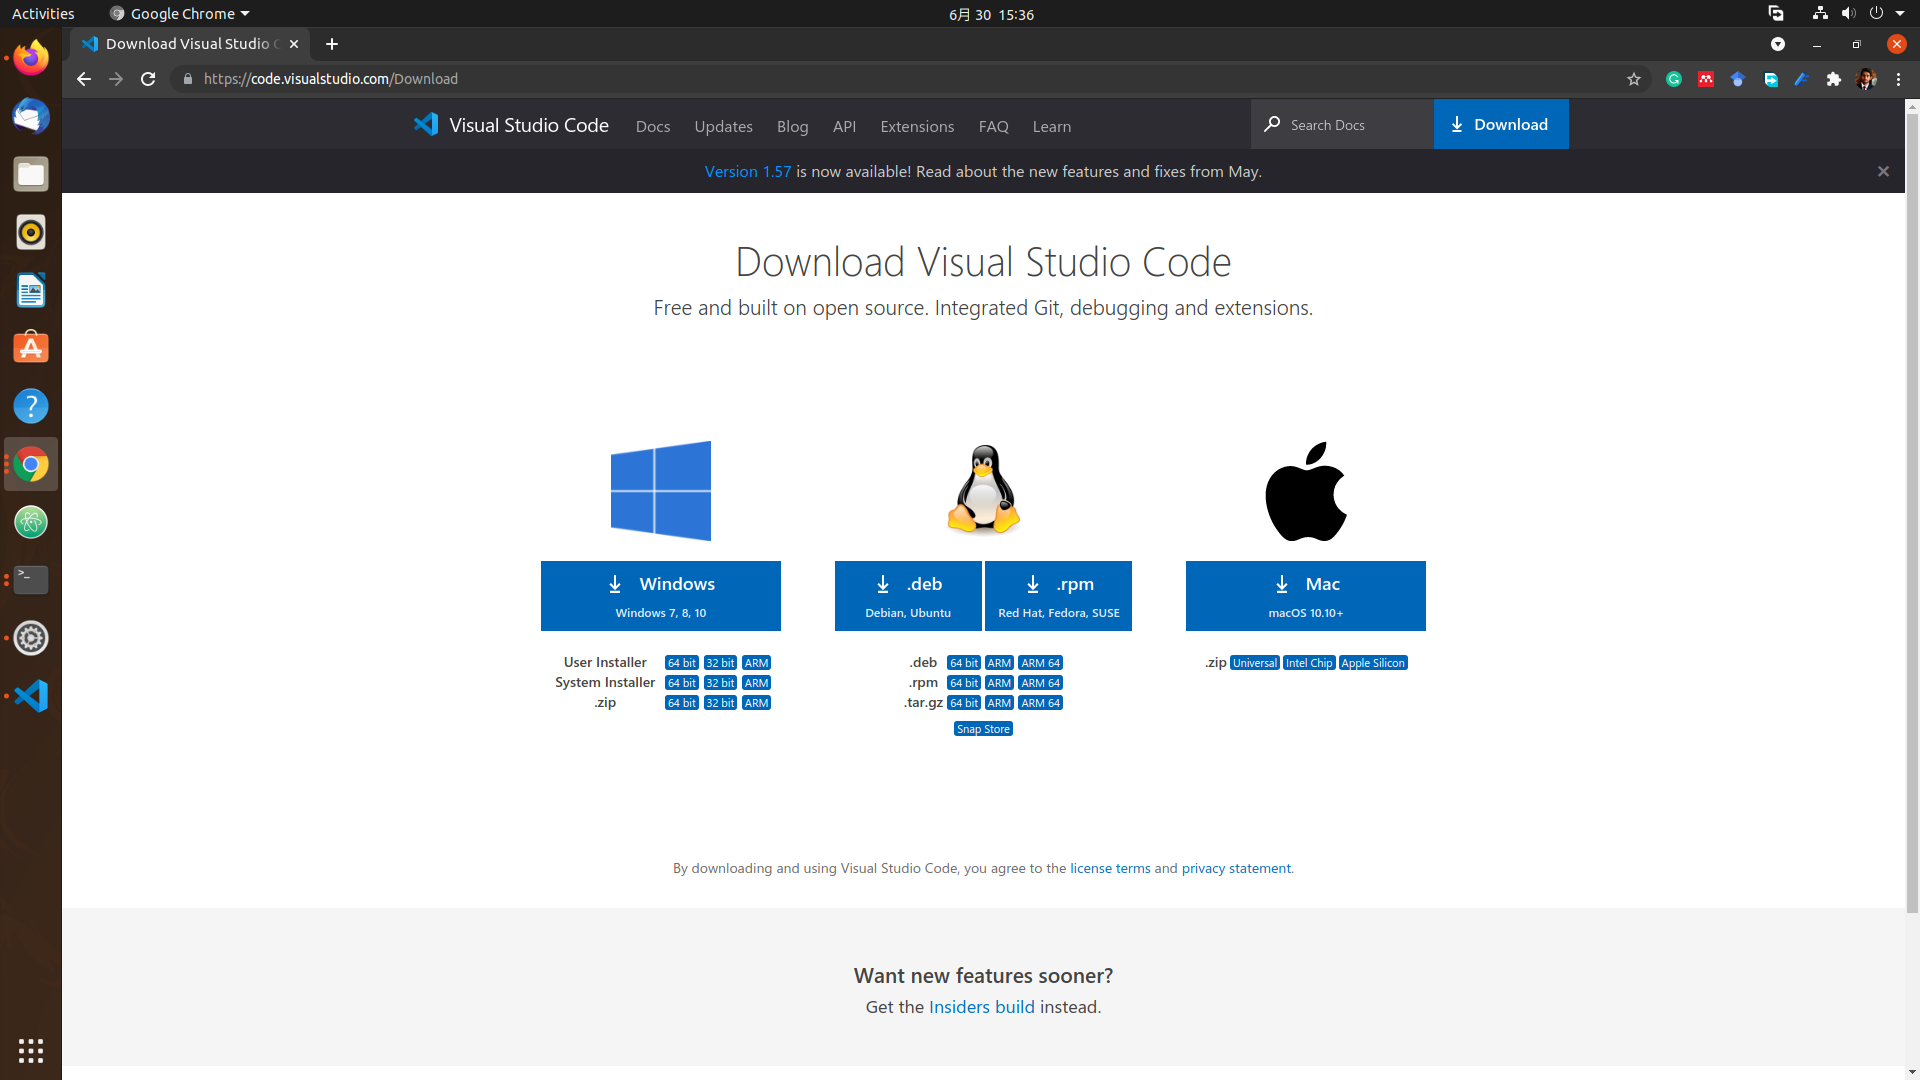
- Download vs code vs code from official site
- Install Python extension for vs code
- select python interpreter and run the code
1. Downloading vs code
go to the official website and download vs code vs code according to your OS and install it. accept the recommended configurations and prompts if there are any and install it.
2. Installing python extension
Once its finisehd installing. fire it up and in the left panel search for the extentions icon and click on it. then in the search bar search for python.
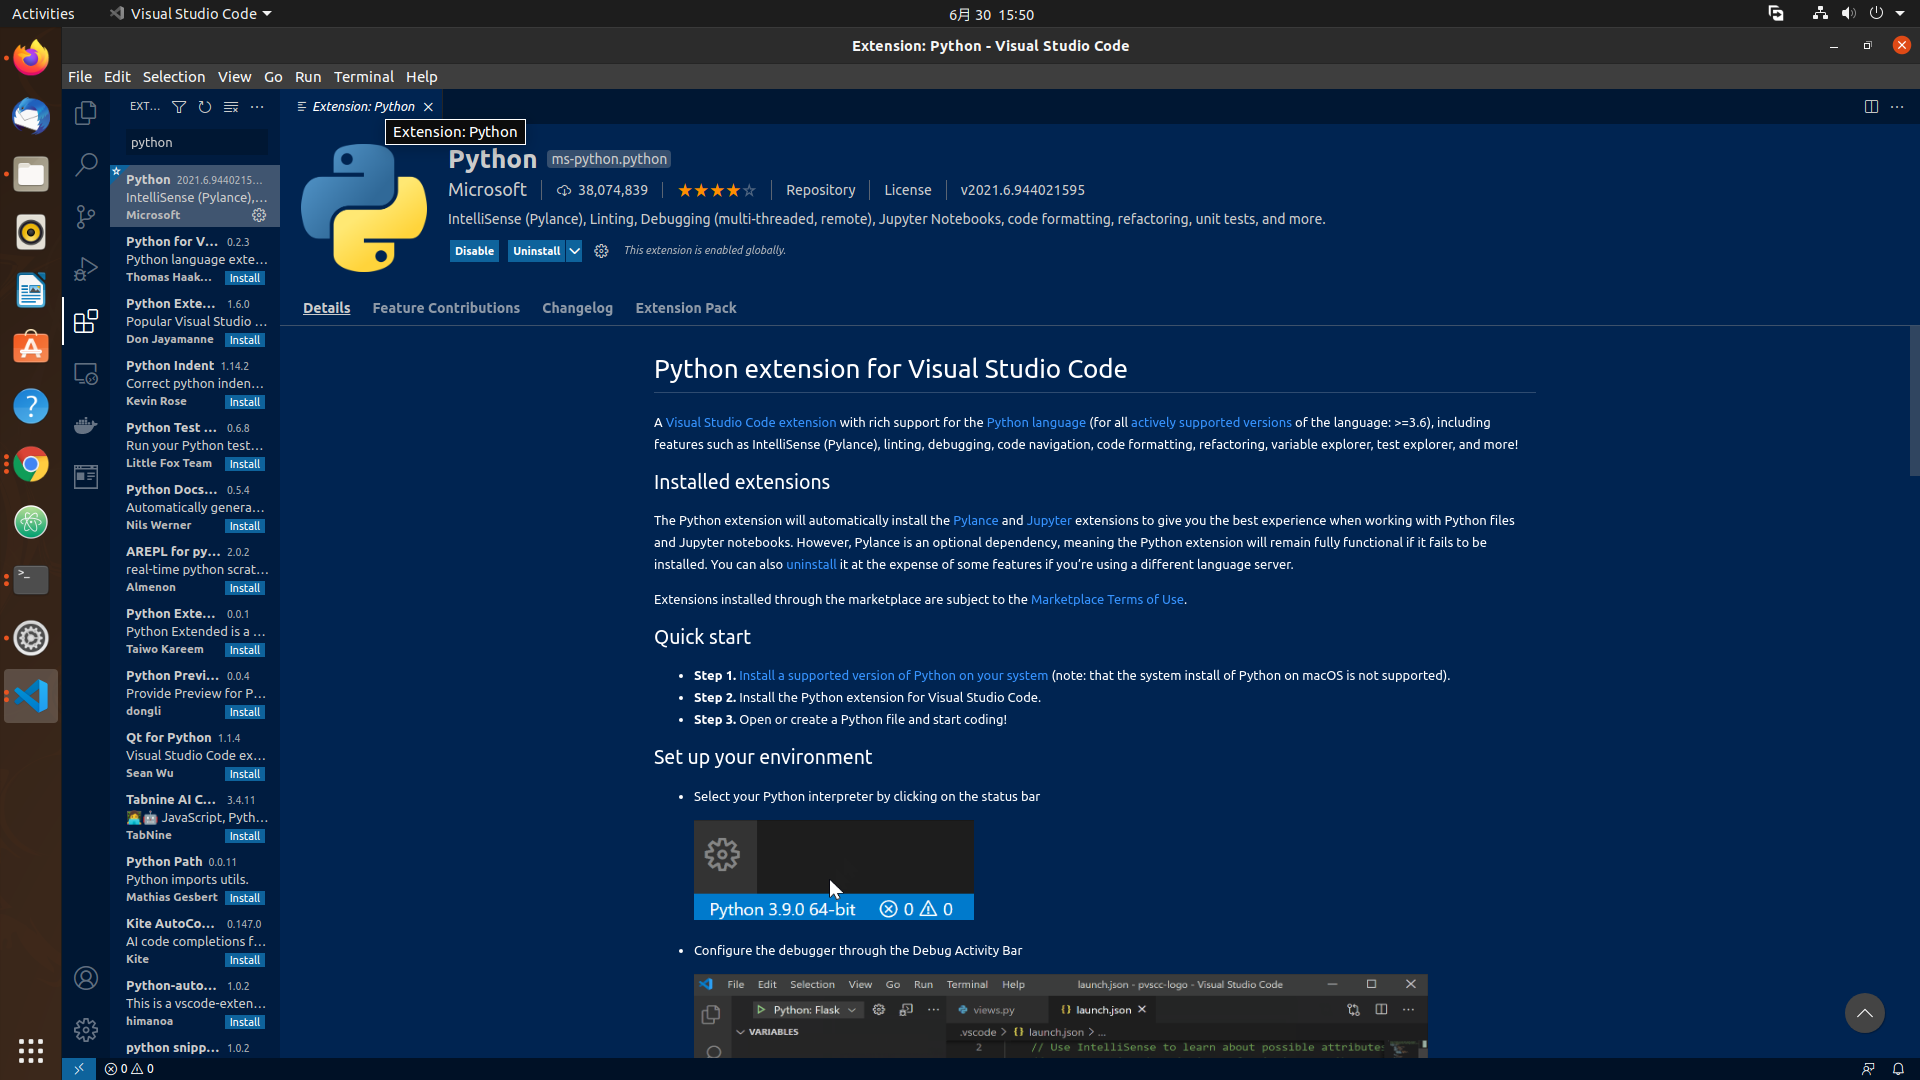
install the extention and make sure it’s enabled. follwo the rest of the tutorial on the extesion page that showed up to select python iterpretor as well as to run and debug code.
Notice: installing python extention does not install python programming language in the system. It’s basically just a bridge for vscode to communicate with the python installed in the system.It also has some editional features like code completion and debugging. If you don’t have python installed already, then please refer to the [Python and virtual environment]/blog/python/conda/Python-conda-virtual-environment/ post
PyCharm
Pycharm is an IDE for python developed by JetBrains and used by many, including professionals. it has a community version and a professional version. community version is free and you can apply for a free lincese for professional version if you are a student It has an integrated support for conda and conda environments.
setting up Pycharm for first python project can be a little confusing since it offers many configurations.
Getting Started with Pycharm
Steps to follow:
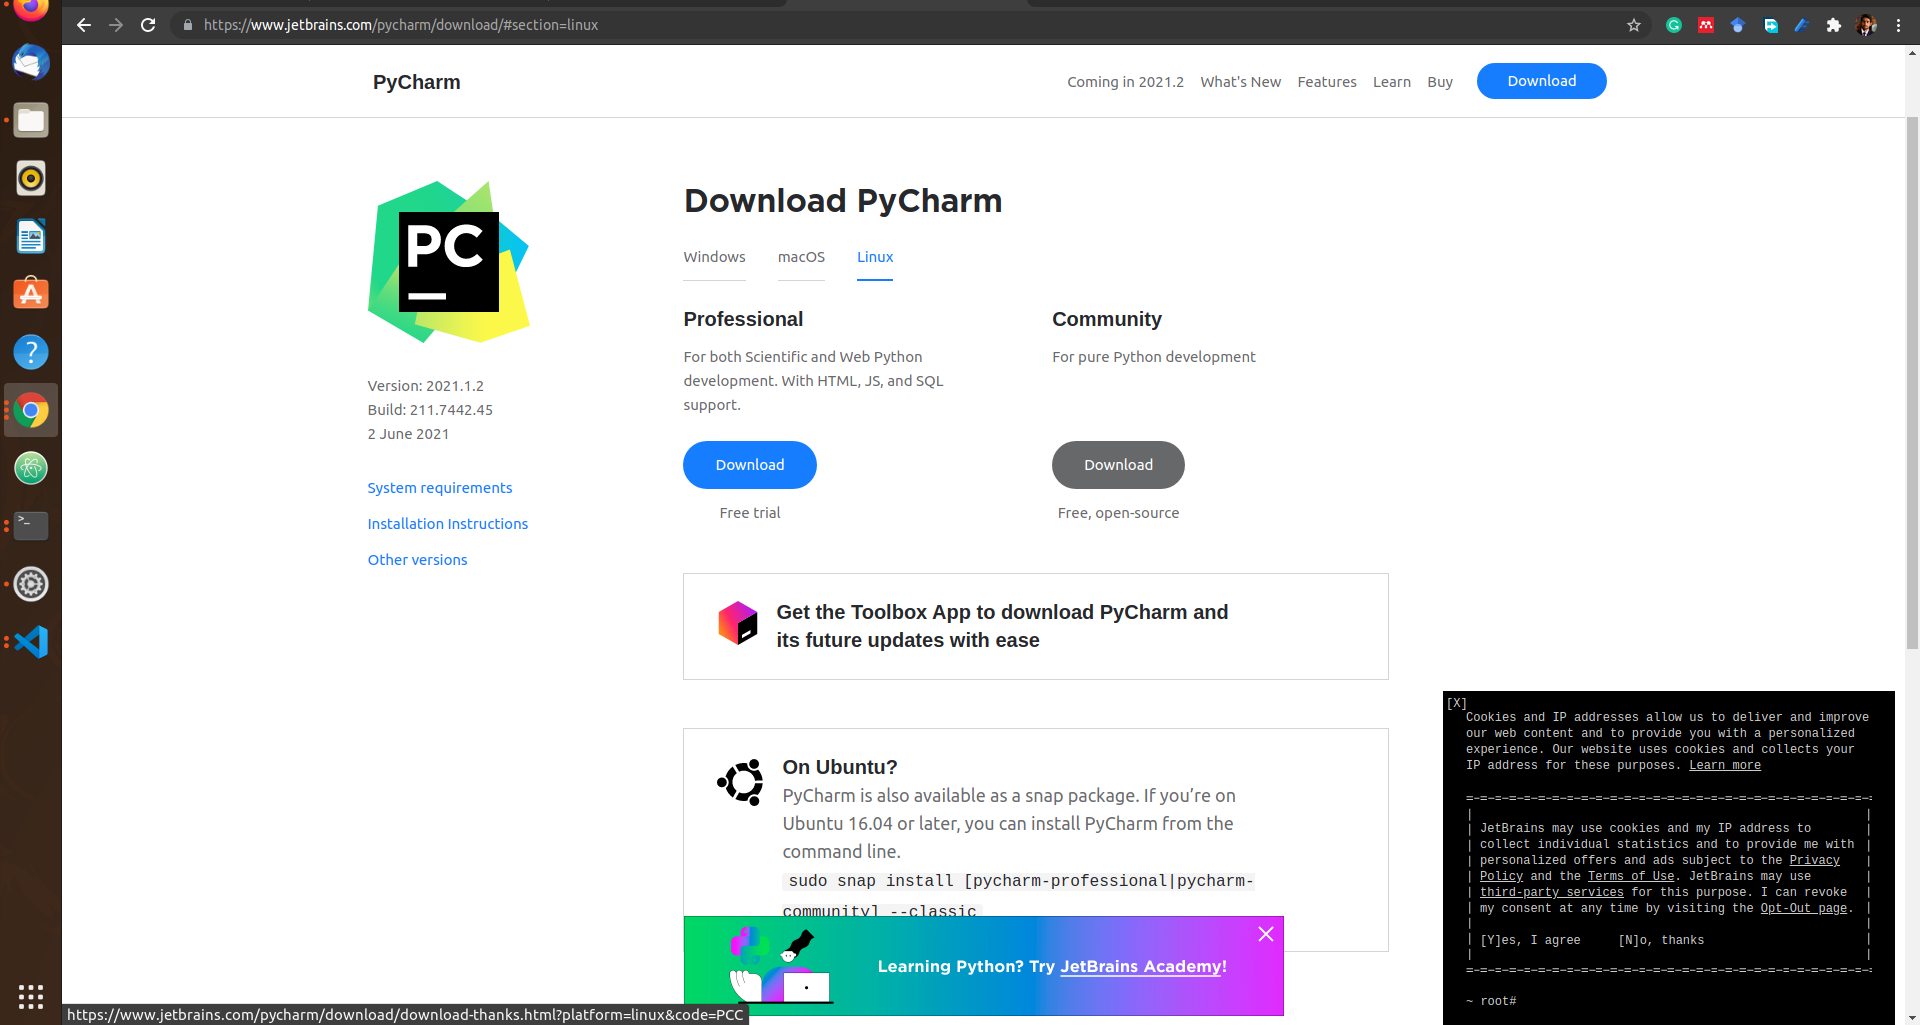
- Go to the official pycharm pycharm website and download the comminity version ( or professional if you got the lincese) and install it
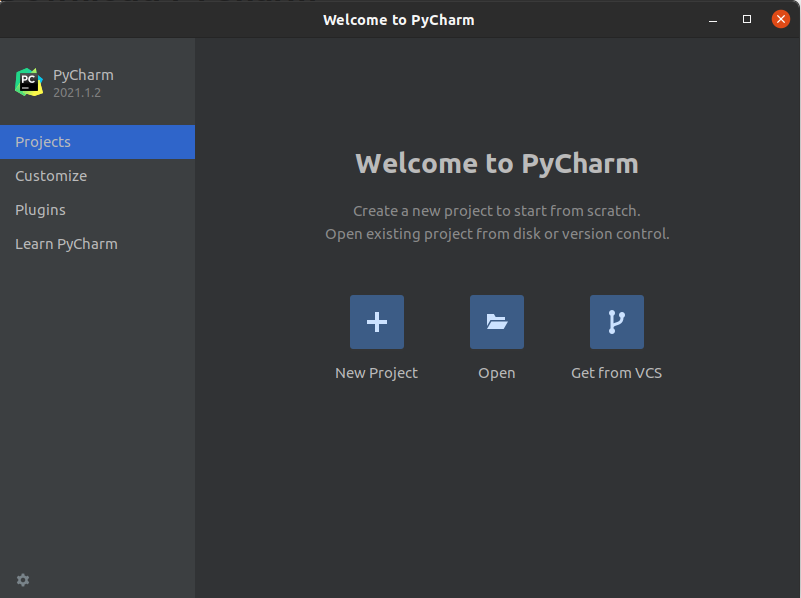
after you are done installing pycharm. create a new project
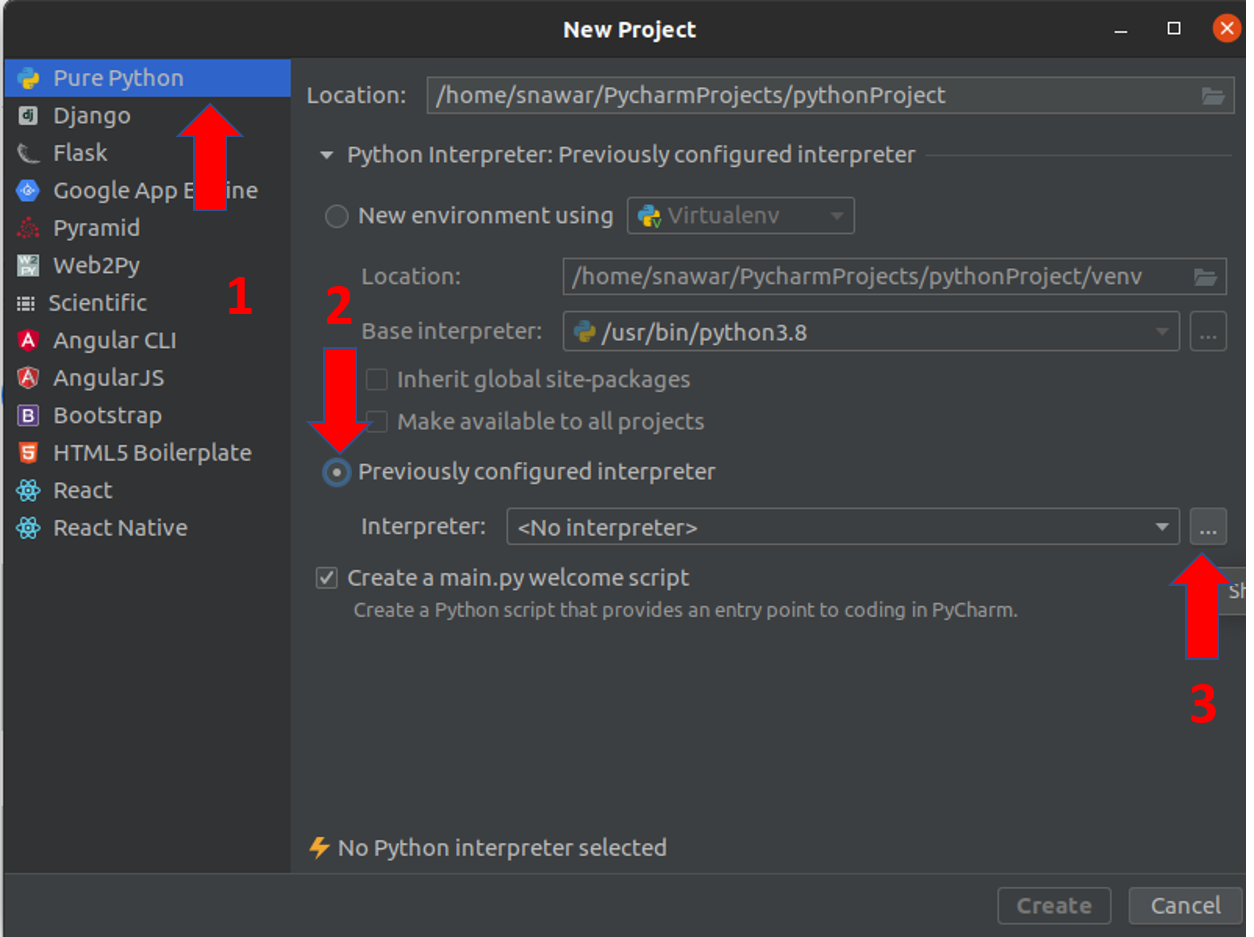
select python in the left panel for project. i am using pycharm professional so it’s giving me all those options to select from. python is available on both community and professional version.
since we already have conda environment we created earlier in the previous post, therefore on the right panel we will select
“previously configure interpreter”
you’ll notice the drop down menu is empty,
click the three dots ... next to it it will take to you the next panel for selecting and interpreter.
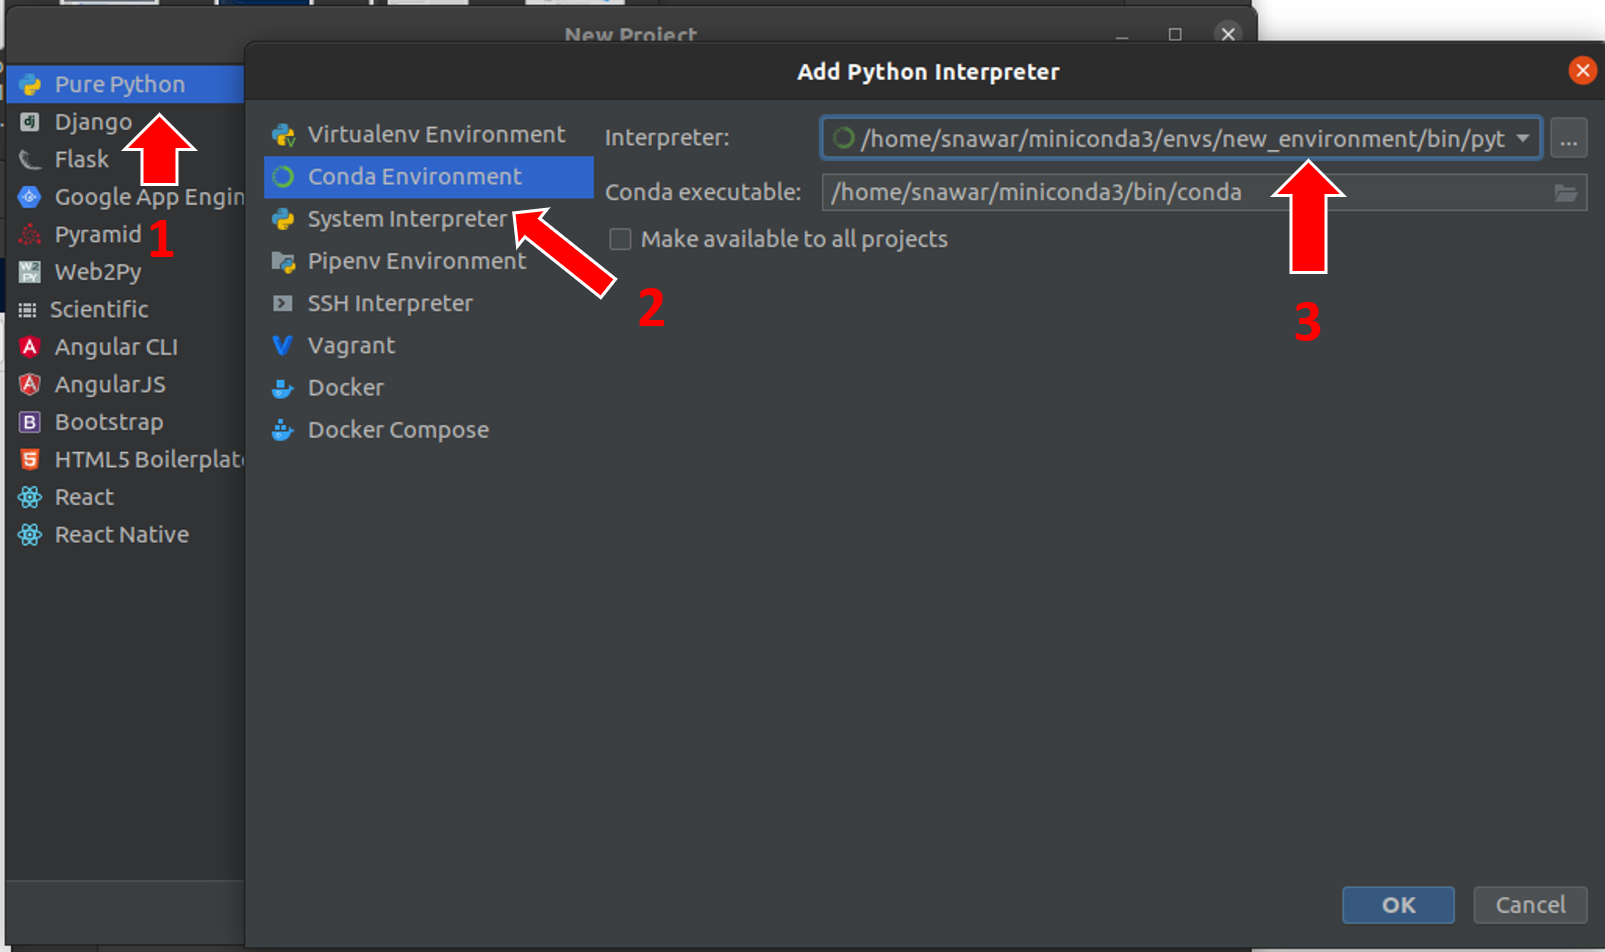
pycharm will look for different python inpreters installed on system.
here on the left panel select Conda Environment and then on the right panel the drop down list will give you all the conda virtual envs present on the system.
from here i am selecting new_environment made in earlier in previous post.
and then accept all the prompts. the project will be loaded in with a main.py file that can be run by clicking the on the top right corner.
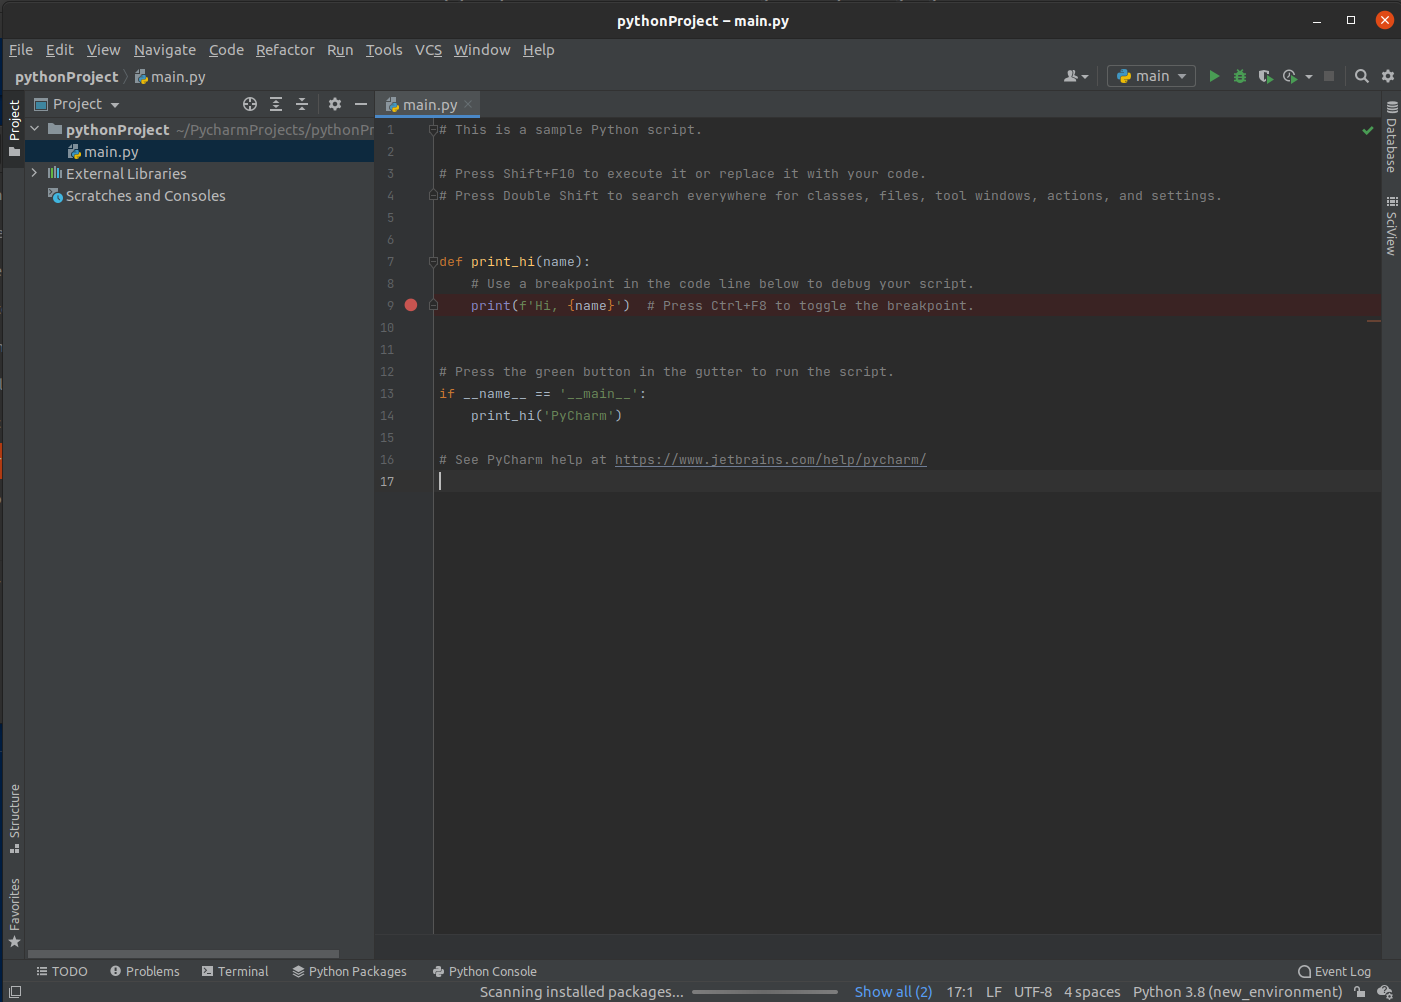
The output of the code will be show in the pycharm’s itegrated terminal
You can add more files by right clicking the project panel on the left and selecting New.
if you play around the pycharm settings you will find that you can search and install python packages in the conda environments from within pycharm. pycharm also have smart code suggestions and will automatically suggest to install the packages that you are using in your code but are missing from the python interpreter you are using. Pycharm is a full-fledged IDE so it has so many other options and configuration that you can explore by yourself or reading the official documentation of pycharm.
Share on
Twitter Facebook LinkedInComments are configured with provider: facebook, but are disabled in non-production environments.